Why Your Cast Iron Skillet is Not Nonstick Yet

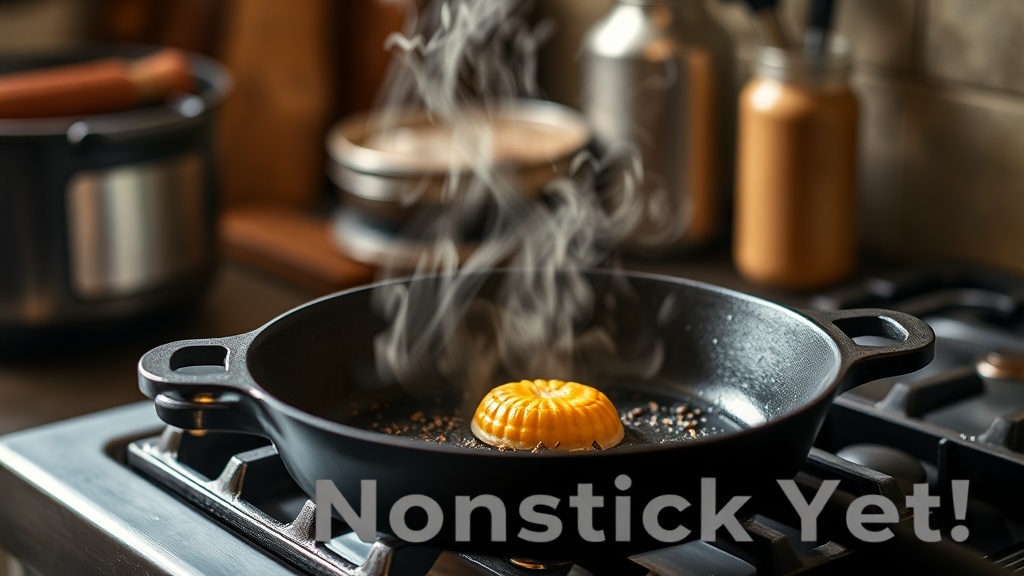
The frustration of the stuck egg
A cast iron skillet sits on a high flame, a knob of salted butter melting into a golden pool. A single egg is cracked into the center, but instead of a clean slide, the white clings stubbornly to the metal. As the spatula attempts to lift the egg, the bottom tears into ragged, translucent strips, leaving a mess of protein stuck to the pan. This is the common reality for many home cooks who have purchased a heavy Lodge or Le Creuset skillet, only to find that the promised "nonstick" performance remains elusive.
This guide explains why your cast iron is failing to perform and how to fix the chemistry of your seasoning. We will move past the vague advice of "just use oil" and look at the actual molecular process of polymerization, the impact of heat management, and the specific mistakes that prevent a functional patina from forming.
Understanding the science of seasoning
Many people mistake "seasoning" for a layer of oil. In reality, seasoning is a process called polymerization. When you heat a fat—such as grapeseed oil or flaxseed oil—to its smoke point, the fatty acid chains break down and cross-link. This creates a hard, plastic-like film that is chemically bonded to the iron surface. This film fills the microscopic pores of the metal, creating a smooth, hydrophobic barrier that prevents food from sticking.
If your pan is sticking, you haven't actually built a polymer; you have likely just created a layer of polymerized grease or, worse, a sticky, gummy residue. A gummy residue occurs when you use fats with low smoke points or when you fail to reach a high enough temperature to complete the cross-linking process. Without a fully polymerized layer, the protein in your food will bond directly to the iron pores rather than sliding over a smooth surface.
The role of fat selection
Not all fats are created equal when it comes to building a patina. To create a durable, nonstick surface, you need oils with high smoke points and stable molecular structures. Using extra virgin olive oil or butter to season a pan is a mistake because these fats break down too quickly and leave behind carbonized debris rather than a smooth film.
- Grapeseed Oil: Highly recommended due to its high smoke point and neutral profile.
- Canola Oil: A reliable, cost-effective option for building initial layers.
- Avocado Oil: Excellent for high-heat applications, though more expensive for bulk seasoning.
- Avoid: Unrefined oils like toasted sesame or high-quality butter, which will burn and create a textured, sticky mess.
Common mistakes that ruin your patina
The most frequent reason a cast iron skillet fails to become nonstick is the presence of "carbon buildup." This is not the same as seasoning. Carbon buildup is a layer of burnt food particles and degraded oil that creates a rough, sandpaper-like texture. This texture provides more surface area for food to grab onto, effectively making your pan more "stick" than "nonstick."
Improper cleaning habits
While the old adage of "never use soap" is a bit of an exaggeration, you must be careful with modern detergents. If you use a heavy amount of degreaser or an abrasive scouring pad after every use, you are physically stripping away the thin layers of polymerized oil you have worked to build. A better approach is to use a stiff nylon brush and hot water to remove food debris, then dry the pan immediately over a low flame to ensure no moisture remains in the pores.
Temperature mismanagement
Cast iron is a heat sink; it absorbs and holds thermal energy with immense efficiency. If you drop a cold protein into a pan that hasn't reached the correct temperature, the protein will bond to the metal. However, if you overheat the pan without enough oil, you will undergo "oil degradation," where the oil turns into a charred, bitter-tasting sludge. You must find the "sweet spot" where the oil is shimmering and just beginning to produce a faint, wispy smoke, but has not yet turned dark and acrid.
The step-by-step protocol for a functional seasoning
To move from a raw iron surface to a professional-grade nonstick surface, follow this technical protocol. This is not a one-time event, but a repetitive process of building thin, microscopic layers.
- Deep Clean: If the pan has a sticky residue, scrub it with coarse kosher salt and a little oil to remove the degraded layers. You want to get back to a smooth, albeit dull, surface.
- Dry Thoroughly: Place the pan on a stove burner over medium heat for 5-10 minutes. Any microscopic water droplets left in the pores will prevent the oil from bonding to the iron.
- The Micro-Layer Technique: This is where most people fail. Do not pour oil into the pan. Instead, apply a very small amount of grapeseed oil to a paper towel and rub it over the entire surface—inside, outside, and the handle.
- The Wipe-Off: Take a clean paper towel and wipe the pan as if you are trying to remove all the oil. You want a microscopic film, not a visible pool. If the pan looks "wet," you have applied too much, and it will become gummy in the oven.
- The Bake: Place the pan upside down in an oven preheated to 450°F (230°C) for one hour. This sustained heat ensures the polymerization is complete throughout the entire thickness of the oil layer.
- Repeat: For a new pan, repeat this process three to five times. Each layer should be nearly invisible.
Maintaining the surface during daily cooking
Once you have achieved a successful seasoning, maintenance is about preventing oxidation (rust) and carbon buildup. When cooking high-protein foods like steak or scallops, the heat required can often strip away the delicate oils used during the cooking process. To maintain the integrity of your pan, pay attention to the fats you use during the actual cook.
For searing meats, use a fat that can withstand the heat of the pan without breaking down. While you are building the patina, you might focus on deep flavors, but for the maintenance of the pan itself, stability is key. For example, when working with delicate aromatics or building deep savory profiles, ensure you aren't using oils that will leave a burnt residue. Understanding how to harness high-quality oils for flavor is a different skill than using them for pan maintenance, but both require an understanding of smoke points.
After cooking, follow this three-step maintenance routine:
- Deglaze or Clean: While the pan is still warm, use hot water and a stiff brush to remove food particles. If there are stubborn bits, use a small amount of coarse salt as an abrasive.
- Dry via Heat: Never air-dry cast iron. Place it back on the stovetop burner for two minutes to evaporate all moisture.
- The Maintenance Wipe: While the pan is hot, apply a tiny drop of oil and buff it into the surface with a paper towel until the pan no longer looks greasy. This adds a fresh, microscopic layer of protection before storage.
Troubleshooting common issues
Problem: The pan feels tacky or sticky.
Solution: You have applied too much oil or didn't reach a high enough temperature during the baking process. The oil has partially polymerized but remains in a "gel" state. Scrub the pan with salt to remove the tacky layer and restart the seasoning process with much thinner applications of oil.
Problem: Food sticks even when the pan is hot.
Solution: You likely have a layer of carbon buildup. The surface is too rough. You need to perform a more aggressive cleaning—possibly using a chainmail scrubber—to level the surface before re-seasoning.
Problem: The pan has a dull, grey appearance.
Solution: This is often a sign of insufficient seasoning or a lack of oil during the cooking process. A well-seasoned pan should have a deep, dark, almost black sheen. This is a visual indicator of a thick, successful polymer layer.
Cast iron is a living tool. It is not a static piece of kitchenware, but a surface that responds to the heat you apply and the fats you choose. By mastering the science of polymerization and respecting the thin margins of temperature control, you can transform a frustrating, sticky pan into the most reliable tool in your kitchen.